
Pressure washing your roof is an effective way to remove algae, moss, and dirt, enhancing your home’s curb appeal and prolonging the lifespan of your shingles. However, this task requires careful handling to avoid damage.
In this comprehensive guide, we’ll walk you through each step of the pressure washing process, from preparing the area and choosing the right equipment to safely executing the wash. Whether you’re a DIY enthusiast or just looking to maintain your roof’s pristine condition, our step-by-step instructions will ensure you achieve professional results without the stress.
How To Pressure Wash A Roof: Step-By-Step Guide
1. Assess Your Roof and Equipment
Before starting the pressure washing process, it’s crucial to assess the condition of your roof and the equipment you’ll be using. Inspect your roof for any damaged or loose shingles, and ensure that it’s safe to walk on. If you have any concerns about potential damage or safety, consider consulting a professional. For the pressure washing task, you’ll need a pressure washer with adjustable pressure settings, a ladder, safety gear, and a cleaning solution designed for roof cleaning. Ensure your pressure washer is equipped with the correct nozzle for delicate surfaces—usually a wide-angle nozzle to prevent damage. Properly assessing your roof and gathering the right equipment are essential for a successful and safe cleaning job.
Also Read:- Benefits Of Commercial Pressure Washing
2. Prepare the Area
Preparing the area around your roof is a critical step in the pressure washing process. Start by removing any outdoor furniture, plants, or other items near the house to prevent them from getting damaged or soiled. Cover delicate plants with tarps or plastic sheeting to protect them from the cleaning solution and debris. Additionally, make sure your gutters and downspouts are clear of leaves and other obstructions, as the cleaning process can loosen debris and cause blockages. This preparation will help you avoid accidental damage and ensure that the cleaning process is as effective and efficient as possible.
3. Safety Precautions
Safety is paramount when pressure washing your roof. Wear appropriate safety gear, including non-slip shoes, gloves, and eye protection, to prevent injuries from falling debris or splashing cleaning solutions. Use a sturdy ladder and ensure it’s placed on a stable surface. If your roof is steep or high, consider using a safety harness or a roof safety system. Avoid working on your roof during adverse weather conditions, such as rain or strong winds, which can increase the risk of accidents. By taking these safety precautions, you can minimize the risk of injury and make the pressure washing process more secure.
4. Apply Cleaning Solution
Once you’ve prepared the area and ensured your safety, it’s time to apply the cleaning solution. Choose a roof cleaner that is suitable for your roof type and follow the manufacturer’s instructions for dilution and application. Using a pump sprayer or a soap dispenser attachment on your pressure washer, evenly apply the cleaning solution across the roof, starting from the bottom and working your way up. Allow the solution to sit for 15-20 minutes to break down dirt, algae, and moss. Avoid letting the solution dry on the roof, as this can leave residue and make it harder to rinse off. This step is crucial for loosening and removing stubborn stains and contaminants.
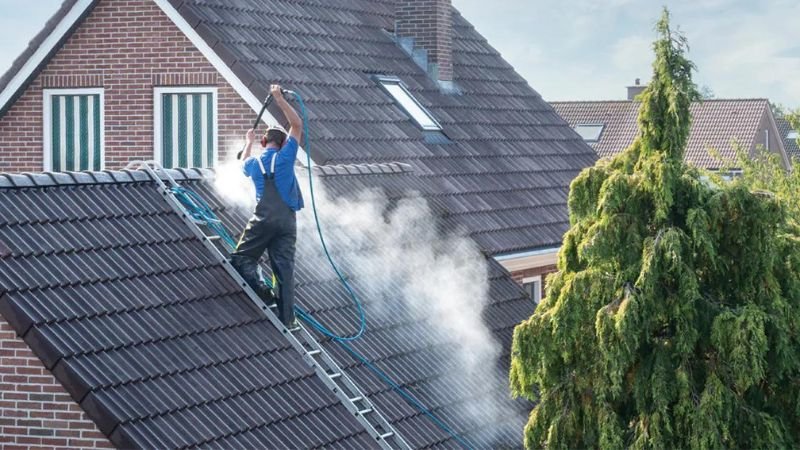
5. Pressure Wash the Roof
With the cleaning solution applied and allowed to dwell, you can begin the pressure washing process. Set your pressure washer to a low-pressure setting, typically around 500-800 PSI, to prevent damage to the roof’s surface. Using a wide-angle nozzle, start at the top of the roof and work your way down, washing in overlapping rows to ensure even coverage. Keep the nozzle at a consistent distance from the roof surface, generally 2-3 feet away, to avoid gouging or damaging shingles. Move slowly and steadily, paying extra attention to areas with heavy buildup. This method ensures that the cleaning solution is thoroughly rinsed away, leaving your roof clean and refreshed.
6. Rinse and Inspect
After pressure washing, it’s important to thoroughly rinse the roof to remove any remaining cleaning solution and debris. Use a garden hose with a spray nozzle or a low-pressure setting on your pressure washer to rinse from the top down, ensuring that all cleaning solution is washed away. Once the rinsing is complete, inspect your roof for any missed spots or areas that may need additional cleaning. This final inspection allows you to address any remaining stains or dirt and ensures that your roof is left in optimal condition. Check for any signs of damage or areas that may require repair, and take note of them for future maintenance.
Also Read:- How To Pressure Wash Wood Decking
7. Clean Up and Maintenance
Once you’ve finished cleaning your roof, it’s time to clean up and perform any necessary maintenance. Remove and clean all equipment, including the pressure washer, nozzles, and hoses. Carefully inspect your roof and gutters to ensure that they are free of debris and functioning properly. Reinstall any removed items, such as outdoor furniture and plants, and remove any protective coverings. It’s also a good idea to check your roof periodically for any signs of damage or wear, especially after pressure washing. Regular maintenance and inspections will help prolong the lifespan of your roof and keep it looking its best.
Conclusion
Pressure washing your roof can be a transformative task, restoring its beauty and boosting your home’s overall appearance. By following these detailed steps, you can efficiently clean your roof while minimizing risks. Remember, safety is paramount—use appropriate equipment and take necessary precautions. With a little effort and the right approach, your roof will look refreshed and well-maintained for years to come.
FAQs
Can I use a pressure washer on any type of roof?
No, pressure washing is not suitable for all roof types. Avoid using it on asphalt shingles or delicate roofing materials. Consult a professional if you’re unsure.
How often should I pressure wash my roof?
Generally, it’s advisable to pressure wash your roof every 1-2 years, depending on your climate and the extent of moss or algae buildup. Regular inspections can help determine the best timing.